
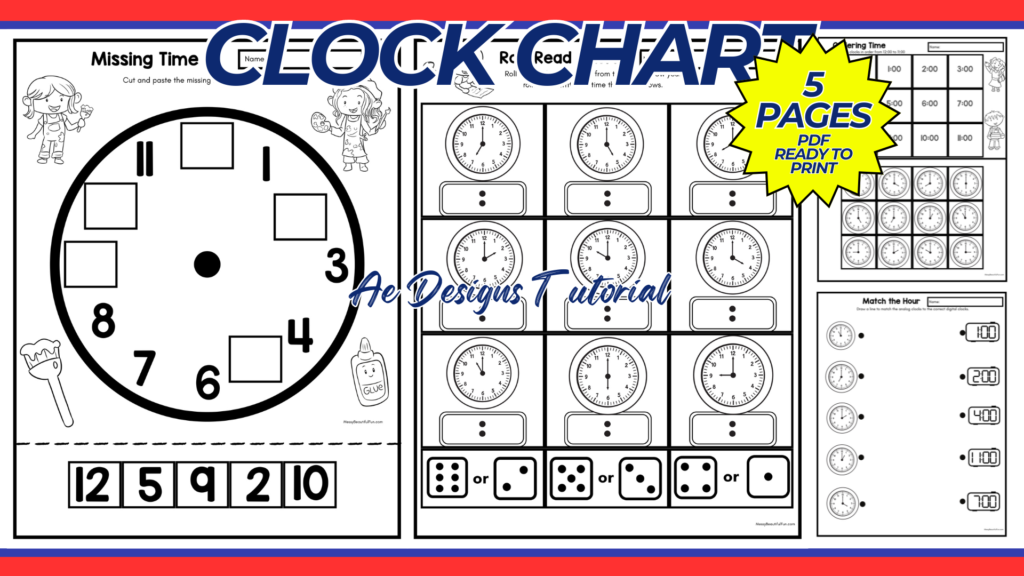
Creating a clock chart to help children learn to tell time is an excellent educational tool. This guide will provide detailed steps on how to create an effective clock chart, along with tips for teaching time-telling skills to children. A well-designed clock chart can make learning fun and engaging, and can be a valuable resource for both parents and teachers.
1. Purpose and Benefits
Purpose:
- To teach children how to read analog clocks.
- To provide a visual aid that makes understanding time concepts easier.
Benefits:
- Enhances cognitive and mathematical skills.
- Improves daily time management and scheduling abilities.
- Makes learning interactive and enjoyable.
2. Materials Needed
- Computer with internet access
- Canva account (free or Pro)
- Printer
- A4 size bond paper or cardstock (for durability)
- Scissors or cutting tool
- Glue, double-sided tape, or laminator (optional for durability)
3. Designing the Clock Chart in Canva
Step-by-Step Design Process:
- Create a Canva Account:
- Sign up for a free account at Canva.
- Start a New Design:
- Click on “Create a design” and select “Custom dimensions.” Set the dimensions to 11 x 8.5 inches (landscape A4 size).
- Design the Clock Face:
- Use Canva’s search bar to find a clock face template or create your own using shapes and lines.
- Clock Face: Create a large circle in the center of the design. Inside this circle, add a smaller circle to represent the clock center.
- Numbers: Add numbers 1 to 12 around the clock face, evenly spaced. Ensure the numbers are large and clear.
- Minute Markers: Add small lines or dots between the numbers to represent the minutes. Highlight the 5-minute intervals for clarity.
- Add Hour and Minute Hands:
- Create two arrows of different lengths to represent the hour and minute hands. The hour hand should be shorter, and the minute hand should be longer.
- Use contrasting colors to differentiate the hands from the clock face.
- Label the Clock:
- Hours: Label the hours clearly. You can use different colors for each quarter (e.g., 12-3, 3-6, 6-9, 9-12) to help with learning.
- Minutes: Add minute labels (optional) to further aid in learning. Highlight the key minutes (15, 30, 45) with slightly larger markers or different colors.
- Interactive Elements:
- Include movable clock hands if creating a digital version. If printing, consider creating cut-out hands that can be attached with a brad fastener to allow movement.
- Design Enhancements:
- Add images or designs around the clock to make it visually appealing (e.g., sun and moon for AM/PM, school icons for specific times).
- Use bright colors to make the chart engaging and fun for children.
- Download and Print:
- Once your design is complete, download it as a high-quality PDF for printing. Choose “PDF Print” for the best resolution.
4. Printing and Assembling the Clock Chart
- Print the Clock Chart:
- Print the design on A4 size bond paper or cardstock for better durability.
- Cut Out and Assemble:
- If you have created movable hands, cut them out carefully.
- Attach the hands to the clock face using a brad fastener, allowing them to rotate.
- Laminate (Optional):
- For added durability, laminate the clock chart and hands. This makes it reusable and easy to clean.
5. Teaching Time-Telling Skills
Basic Concepts:
- Start by teaching the child about the two hands of the clock: the short hand (hour hand) and the long hand (minute hand).
- Explain the position of the numbers and how the clock is divided into hours and minutes.
Step-by-Step Learning:
- Hours:
- Begin with the hour hand. Explain that the short hand points to the current hour.
- Practice by moving the hour hand to different numbers and asking the child what hour it is.
- Half Hours and Quarter Hours:
- Introduce the concept of half past (e.g., when the minute hand is on 6, it’s half past the hour).
- Teach quarter past (15 minutes) and quarter to (45 minutes) next.
- Minutes:
- Move to the minute hand. Explain that each number represents 5 minutes.
- Practice counting by fives to understand the minute hand positions.
- Combined Reading:
- Teach how to read the clock by combining the positions of the hour and minute hands.
- Start with simple times (e.g., 3:00, 6:30) and gradually move to more complex times (e.g., 4:45, 2:20).
- AM/PM:
- Explain the difference between AM and PM.
- Use visual aids like a sun for AM times and a moon for PM times to help children understand the concept.
6. Practical Applications
Daily Routine:
- Use the clock chart to set times for daily activities (e.g., wake-up time, meal times, bedtime).
- Create a schedule chart alongside the clock chart to reinforce the concept of time.
Games and Activities:
- Time Matching: Create cards with different times and have the child match them to the clock.
- Time Puzzles: Use puzzle pieces with times and corresponding activities.
- Role Play: Act out daily routines using the clock chart to reinforce time concepts.
7. Tips for Success
Consistent Practice:
- Practice regularly to reinforce learning.
- Use everyday opportunities to ask what time it is and involve the child in time-related tasks.
Positive Reinforcement:
- Praise and reward the child for correctly telling the time.
- Use a reward chart to track progress and motivate learning.
Interactive Learning:
- Use apps and online games for additional practice.
- Involve the child in setting the clock for different times to make learning hands-on and interactive.
Conclusion
Creating a clock chart to help children learn to tell time is a valuable educational tool that combines visual learning with interactive elements. By following this comprehensive guide, you can design an engaging and effective clock chart that will aid in teaching time-telling skills. Regular practice, combined with positive reinforcement and interactive activities, will ensure that children master the concept of telling time, setting a strong foundation for their daily routines and time management skills.
NOTE: Isa isahin nyo na lang ung LINK anjan din kasi ung mga MATERIALS na pwede magamit at ung FILES.
Materials
Click here: https://bit.ly/3REjSJX
Click here: https://bit.ly/3OZg2t9
Click here: https://bit.ly/3P5RM93
Click here: https://bit.ly/45JbdLT
Click here: https://bit.ly/3V0JCST
Click here: https://bit.ly/4ctrveY