
Creating custom pencil wraps is a fun and creative way to personalize pencils for school, events, or promotional items. This guide provides a comprehensive approach to designing, printing, and applying pencil wraps using Canva and other materials.
1. Purpose and Benefits
Purpose:
- To personalize pencils with custom designs for various purposes, such as gifts, school supplies, or promotional items.
Benefits:
- Makes pencils unique and recognizable.
- Provides a creative outlet for design and personalization.
- Enhances the appeal of standard pencils, making them more enjoyable to use.
2. Materials Needed
- Computer with internet access
- Canva account (free or Pro)
- Printer
- A4 size adhesive paper or regular paper with adhesive tape/glue
- Scissors or paper cutter
- Clear adhesive tape or laminating sheets (optional for durability)
3. Designing the Pencil Wrap in Canva
Step-by-Step Design Process:
- Create a Canva Account:
- Sign up for a free account at Canva.
- Start a New Design:
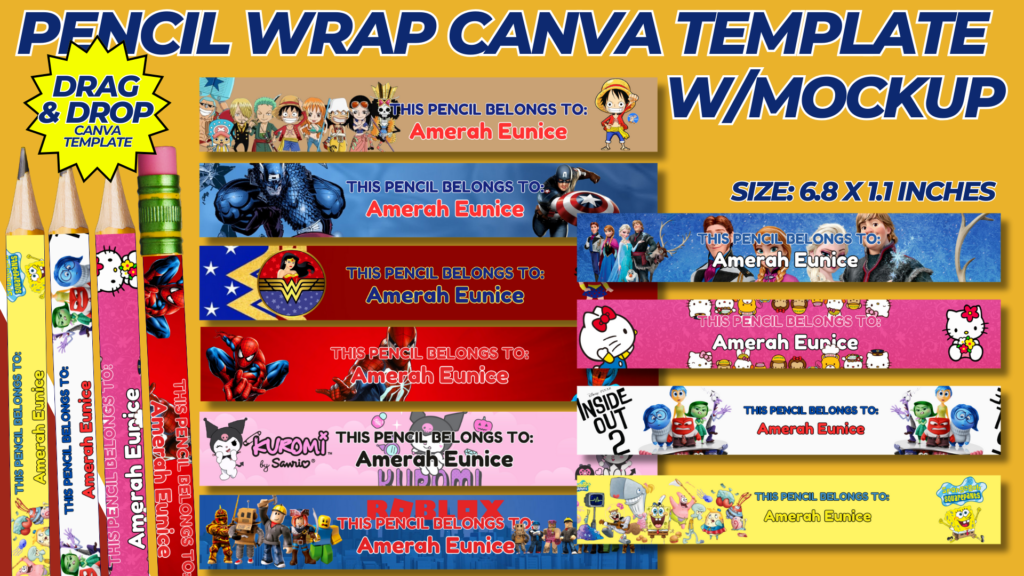
- Click on “Create a design” and select “Custom dimensions.” Set the dimensions to 0.75 x 4 inches. This size fits standard pencils and allows for easy wrapping.
- Background and Patterns:
- Choose a background color or pattern that suits your theme. Canva offers a wide range of patterns, from simple colors to intricate designs.
- Consider using school-related themes, favorite colors, or seasonal patterns.
- Add Text:
- Include personalized text, such as names, motivational quotes, or subjects. Use clear, legible fonts that stand out against the background.
- Position the text in the center or at the ends of the wrap to ensure visibility when wrapped around the pencil.
- Graphics and Icons:
- Incorporate small graphics or icons related to your theme. For example, add school-related icons like books, apples, or stars for a back-to-school design.
- Use Canva’s extensive library of free graphics or upload your own images.
- Finishing Touches:
- Add any additional elements, such as borders or small decorative details, to enhance the design.
- Ensure all elements are within the template dimensions and aligned properly.
4. Printing and Cutting the Pencil Wraps
- Download the Design:
- Once your design is complete, download it as a high-quality PDF or image file.
- Print the Wraps:
- Print the designs on A4 size adhesive paper for easy application. If adhesive paper is not available, print on regular paper and use adhesive tape or glue.
- Ensure the printer settings are set to high-quality printing for the best results.
- Cut the Wraps:
- Carefully cut out each pencil wrap using scissors or a paper cutter. Precision is key to ensure the wraps fit perfectly around the pencils.
5. Applying the Pencil Wraps
- Prepare the Pencils:
- Clean the surface of the pencils to ensure the wraps adhere properly. Remove any dust or residue.
- Wrap the Pencils:
- Peel off the backing of the adhesive paper and align the wrap with the pencil. Start from one end and slowly wrap it around the pencil, smoothing out any air bubbles as you go.
- If using regular paper, apply a thin layer of glue or double-sided tape to the back of the wrap before applying it to the pencil.
- Secure the Wraps:
- For added durability, you can cover the wraps with clear adhesive tape or laminating sheets. This will protect the designs from wear and tear.
6. Creative Tips and Ideas
Themes and Occasions:
- Design wraps for various themes such as holidays, school subjects, or special events (e.g., birthdays, graduations).
- Create seasonal designs, such as winter themes with snowflakes or summer themes with beach icons.
Personalization:
- Include the recipient’s name or initials for a personal touch. This is great for school supplies or gifts.
- Use motivational quotes or affirmations to inspire and encourage the user.
Collections:
- Design sets of pencil wraps that can be used together. For example, create a series of wraps with different characters from a favorite cartoon or book series.
Color Coordination:
- Coordinate the colors of the wraps with the colors of the pencils. This creates a cohesive and visually appealing look.
Gift Sets:
- Create gift sets by bundling wrapped pencils with matching notebooks, erasers, or other school supplies.
7. Tips for Success
High-Quality Images:
- Use high-resolution images and graphics to ensure the designs print clearly and look professional.
Consistent Theme:
- Maintain a consistent theme throughout the set of wraps. This makes the collection look cohesive and well-designed.
Test Print:
- Do a test print on regular paper to check the colors, alignment, and fit before printing on adhesive paper.
User-Friendly Design:
- Ensure the text and graphics are placed in areas that will be visible and not covered when the wrap is applied to the pencil.
Experiment with Sizes:
- While the standard size is 0.75 x 4 inches, you can experiment with slightly different sizes to fit various pencil types or preferences.
Conclusion
Creating custom pencil wraps is a fun and creative way to personalize pencils for various occasions. By following this comprehensive guide, you can design, print, and apply unique pencil wraps that reflect your style and preferences. Regular practice with design tools like Canva, combined with a love for creativity, will ensure your pencil wraps are unique, appealing, and functional. Whether for personal use, gifts, or promotional items, custom pencil wraps add a special touch to everyday writing instruments.
NOTE: Isa isahin nyo na lang ung LINK anjan din kasi ung mga MATERIALS na pwede magamit at ung FILES.
Materials & PENCIL WRAP TEMPLATE W/MOCKUP
Click here: https://bit.ly/3TNClnc
Click here: https://bit.ly/3RNvjiq
Click here: https://bit.ly/4eXAuGu
Click here: https://bit.ly/3RNvp9M
Click here: https://bit.ly/3WgOVhD
Click here: https://bit.ly/4ctrveY