

Designing Trick or Treat Pen Sleeves is a fun way to add a Halloween twist to everyday items! These sleeves could be used for gifting pens, or just as festive decorations. Here’s a step-by-step guide to designing and creating them:
Design Concept for Trick or Treat Pen Sleeves:
1. Sleeve Structure:
- Material: Paper or cardstock, durable enough to hold a pen snugly.
- Size: Measure the pen you are creating the sleeve for. Typically, the sleeve would be around 7 inches long and 2 inches wide (adjust for larger or smaller pens).
- Sleeve Shape:
- A rectangular sleeve with a fold-over flap at the top to secure the pen.
- Or a tubular sleeve (like a wrapper) that fully encloses the pen with both ends sealed.
2. Halloween Theme Design Elements:
Each sleeve should incorporate classic Halloween visuals and text to match the “Trick or Treat” theme.
Front Side of the Sleeve:
- Main Text: Add a fun Halloween message such as:
- “Trick or Treat!”
- “Witching You a Happy Halloween!”
- “Spooky Fun Awaits!”
- Illustrations:
- Pumpkins or Jack-o’-Lanterns: Bright orange pumpkins with spooky or silly faces.
- Ghosts: Playful white ghosts floating on the sides.
- Candy Corn: Colorful candy corn scattered around the design.
- Spiders and Webs: Little black spiders and intricate spider webs in the corners.
- Witch Hats and Bats: Silhouettes of flying bats or a witch’s hat hovering over the text.
Back Side of the Sleeve:
- Trick or Treat Bag Icon: A cute illustration of a trick-or-treat bag filled with candy.
- Personalization Space: Leave a blank space where you can write the recipient’s name (e.g., “Happy Halloween from [Name]!”).
- Patterns: You could use Halloween patterns like stripes, polka dots, or zigzags in orange, black, and purple.
3. Colors and Fonts:
- Colors: Use traditional Halloween colors like:
- Orange: For pumpkins and Halloween energy.
- Black: For bats, spiders, and spooky vibes.
- Purple: For a magical, mystical feel.
- White: For ghosts and accents.
- Fonts: Choose spooky, playful fonts, such as:
- Curly, whimsical fonts for a fun feel (e.g., for “Trick or Treat”).
- Bold, dripping fonts to give it a slightly spooky vibe.
4. Assembly Instructions:
- Cutting: Print the design on cardstock and cut it out according to your pen sleeve shape.
- Folding: Fold the paper/cardstock to form the sleeve. For a tubular sleeve, you could roll the cardstock into a tube and glue the edges.
- Glue/Tape: Secure the sides with glue or double-sided tape, leaving one end open to insert the pen.
- Optional: Punch a small hole in the flap and tie a tiny ribbon or string to close the sleeve for a more finished look.
Bonus Ideas:
- Glow-in-the-Dark Ink: Use glow-in-the-dark paint or ink for some parts of the design (like ghost eyes or spider webs) to give it an extra spooky touch.
- Stickers: Add small Halloween-themed stickers for extra decoration or as part of the design itself.
- Mini Tag: Attach a mini tag that says “Boo!” or “Happy Halloween” as an added detail.
NOTE: Isa isahin nyo na lang ung LINK anjan din kasi ung mga MATERIALS na pwede magamit at ung FILES.
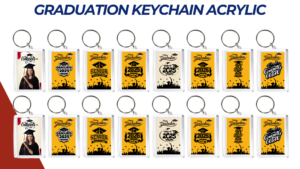
MATERIALS & FILES:
CLICK HERE: https://bit.ly/3REjSJX
CLICK HERE: https://bit.ly/3TPqBl7
CLICK HERE: https://bit.ly/3AS2mMC
CLICK HERE: https://bit.ly/3LeqsCW
CLICK HERE: https://bit.ly/47mjmqn